In our previous blog post we had discussed about How Mass Delete Records in Salesforce. In these blog post we discuss about How to Setup Public Calendar in Salesforce
Contents
- 1 How to Setup Public Calendar in Salesforce
- 1.1 Introduction to public calendar:-
- 1.2 Understanding Salesforce Public Calendars:-
- 1.3 Pre-requisites for Setting Up a Public Calendar:-
- 1.4 Step-by-Step Guide to Setting Up a Public Calendar:-
- 1.5 Configuring Public Calendar Settings:-
- 1.6 Adding Events to Your Public Calendar:-
- 1.7 Sharing the Public Calendar:-
- 1.8 Managing Public Calendar Permissions:-
- 1.9 Best Practices for Using Public Calendars in Salesforce:-
- 1.10 Troubleshooting Common Issues:-
- 1.11 Calendar Not Displaying:-
- 1.12 Conclusion:-
- 1.13 FAQs:-
How to Setup Public Calendar in Salesforce
Introduction to public calendar:-
Calendars are essential for effective time management and coordination, especially in business. Salesforce, a leader in customer relationship management (CRM), offers powerful calendar tools to help teams stay organized. A key feature is the Public Calendar, which lets multiple users view and manage events together. But how do you set it up?
Understanding Salesforce Public Calendars:-
Definition and Purpose:-
A Salesforce Public Calendar is a shared calendar where multiple users can view and schedule events. It’s ideal for coordinating team activities, planning projects, and managing resource bookings.
Benefits of Using Public Calendars:-
Public Calendars streamline communication, enhance visibility into team schedules, and facilitate better resource management. They ensure that everyone is on the same page, minimizing scheduling conflicts and maximizing productivity.
Pre-requisites for Setting Up a Public Calendar:-
Required Permissions:-
Before setting up a Public Calendar, ensure you have the necessary permissions. Typically, you need “Customize Application” permissions, which are usually granted to Salesforce Administrators.
Ensuring Proper Salesforce Edition:-
Public Calendars are available in most Salesforce editions, including Enterprise, Unlimited, and Performance Editions. Verify that your edition supports this feature.
Step-by-Step Guide to Setting Up a Public Calendar:-
Accessing the Setup Menu:-
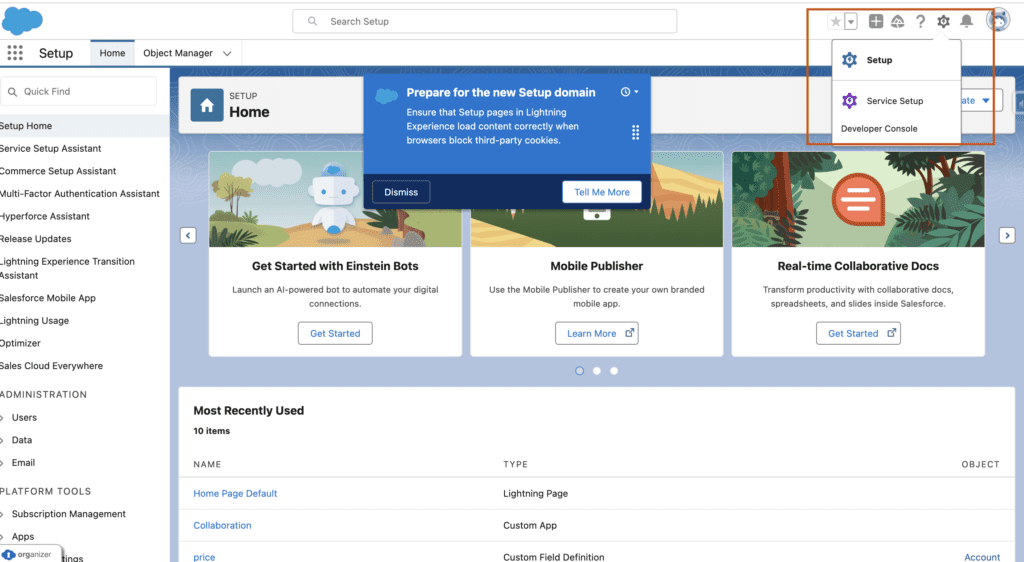
- Log in to your Salesforce account.
- Click on the gear icon in the upper right corner.
- Select “Setup” from the dropdown menu.
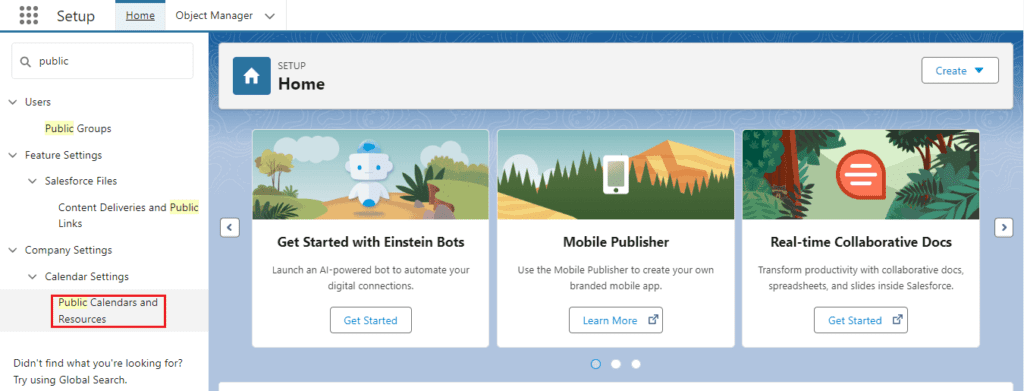
- In the Setup menu, use the Quick Find box and type “Public Calendars and Resources.”
- Click on “Public Calendars and Resources” under the “Calendar” settings.
Creating a New Public Calendar:-
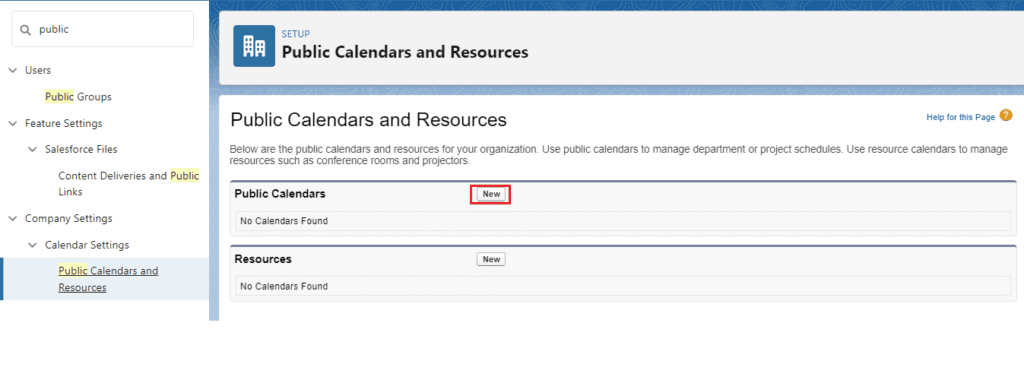
- Click “New” to create a new Public Calendar.
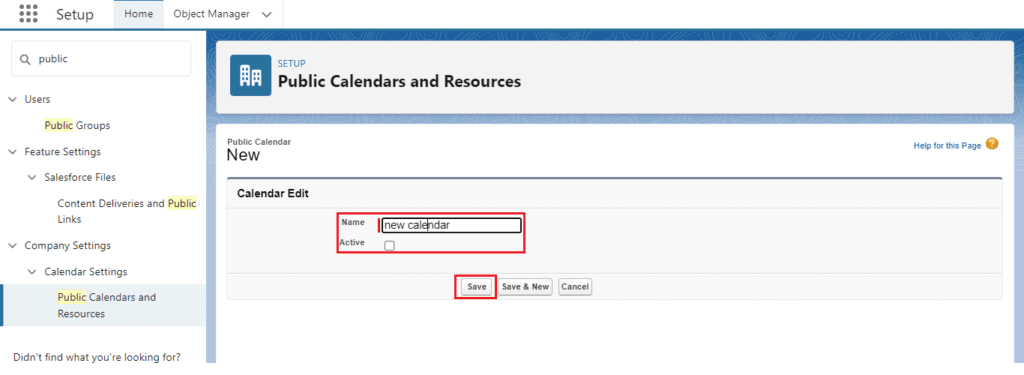
- Fill in the required details such as the Calendar Name and Description.
You want know more about How to Setup Public Calendar in Salesforce click here
Configuring Public Calendar Settings:-
Naming the Calendar:-
Choose a descriptive and easily recognizable name for your calendar to ensure users can quickly identify its purpose.
Setting Permissions:-
Decide who can view and edit the calendar. You can set permissions for different user roles or profiles, ensuring that sensitive events are only accessible to authorized personnel.
Customizing Calendar Settings:-
Customize additional settings such as default event duration, time zone, and recurrence options to match your organization’s needs.
Adding Events to Your Public Calendar:-
Creating Events:-
- Navigate to the calendar view.
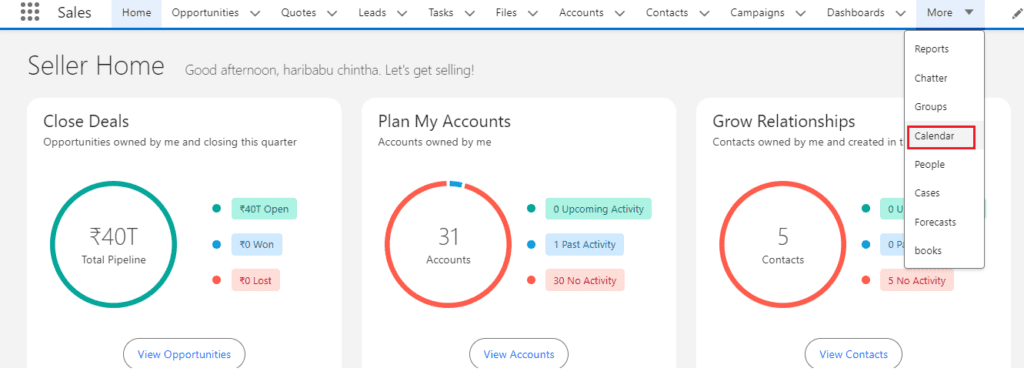
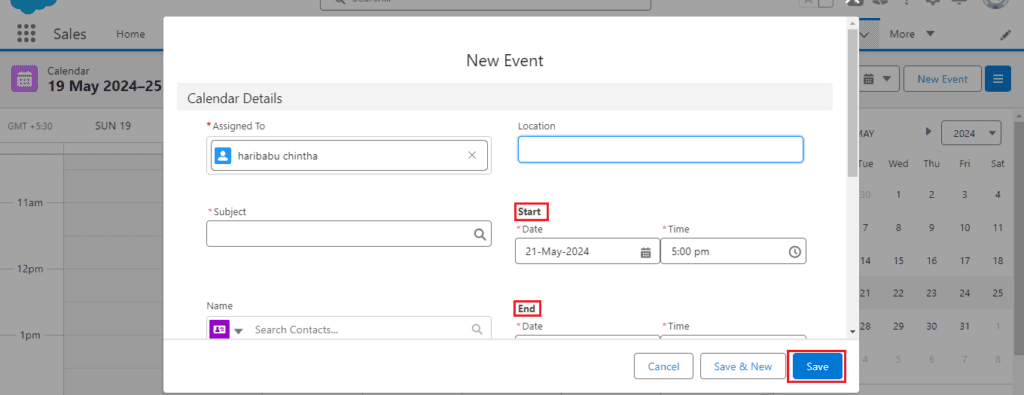
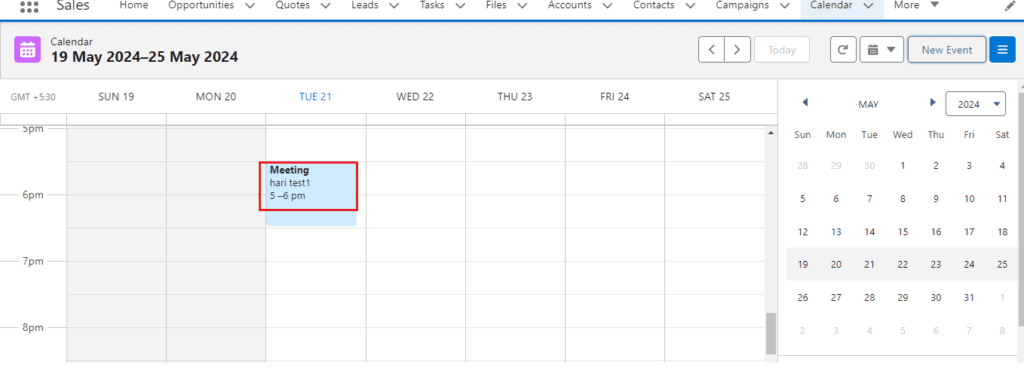
- Click on the desired date and time slot to create a new event.

- Fill in event details like title, location, and description.
Editing and Deleting Events:-
To edit or delete an event, simply click on the event in the calendar view and select the appropriate action from the event details popup.
Setting Event Reminders:-
Set reminders to ensure that users receive notifications ahead of important events, keeping everyone informed and prepared.
Sharing the Public Calendar:-
Sharing with Specific Users or Groups:-
You can share the calendar with specific users, roles, or public groups. Navigate to the sharing settings and add the desired entities with their respective permissions.
Public Access Links:-
Generate a public access link to allow users outside your Salesforce organization to view the calendar. This is useful for sharing schedules with clients or partners.
Embedding Calendar on External Sites:-
Embed your Public Calendar on an external website by using the embed code provided in the calendar settings. This allows for broader accessibility and visibility.
Managing Public Calendar Permissions:-
View vs. Edit Permissions:-
Distinguish between users who can only view events and those who can create or modify them. This helps maintain control over the calendar’s content and prevents unauthorized changes.
Assigning Roles and Permissions:-
Assign roles and permissions based on the users’ responsibilities. For example, project managers might have edit permissions, while team members have view-only access.
Auditing Calendar Access:-
Regularly audit who has access to the calendar and what permissions they hold. This ensures that only authorized users can make changes, maintaining the integrity of the calendar.
Best Practices for Using Public Calendars in Salesforce:-
Keeping the Calendar Organized:-
Regularly review and clean up your calendar to remove outdated events and keep it clutter-free. An organized calendar is easier to navigate and more effective.
Regular Updates and Maintenance:-
Keep your calendar up-to-date by regularly adding new events and updating existing ones. Regular maintenance ensures that your calendar remains a reliable tool for your team.
Training Team Members:-
Train your team on how to use the Public Calendar effectively. Provide resources and guidelines to help them understand how to add, edit, and share events properly.
Troubleshooting Common Issues:-
Calendar Not Displaying:-
If the calendar is not displaying correctly, check your permissions and ensure you have the necessary access. Also, verify that your browser settings are compatible with Salesforce.
Permission Errors:-
Ensure that the appropriate permissions are set for users who need access to the calendar. Review your sharing settings to resolve any permission-related issues.
Sync Issues:-
For synchronization issues with external calendars, check the integration settings and ensure that the correct sync intervals and credentials are used.
Conclusion:-
Setting up a Public Calendar in Salesforce is a straightforward process that can greatly enhance team collaboration and scheduling efficiency. By following the steps outlined in this guide, you’ll be able to create, manage, and optimize your Public Calendar to meet your organization’s needs.
FAQs:-
How to Change Calendar Ownership
To change the ownership of a calendar, navigate to the calendar settings and update the owner field with the new owner’s details.
Can I Sync with Google Calendar?
Yes, you can sync your Salesforce Public Calendar with Google Calendar using various integration tools available on App Exchange.
How to Export Calendar Data
Export calendar data by navigating to the calendar settings and using the export feature. Choose the desired format (e.g., CSV) and download the data.
In our next blog post we will discuss about What is Company Information in Salesforce

3 thoughts on “How to Setup Public Calendar in Salesforce”