In our previous blog post we had discussed about What is Web-to-Lead in Salesforce. In these blog post we discuss about What is Web-to-Case in Salesforce
Contents
What is Web-to-Case in Salesforce
What is Web-to-Case in Salesforce?
Definition of Web-to-Case:-
Web-to-Case is a Salesforce feature that allows businesses to capture customer service requests, known as cases, directly from their website. When a customer fills out a support form on the website, the details are automatically sent to Salesforce, where a new case is created. This feature ensures that customer issues are logged and managed efficiently.
Purpose and Benefits:-
Purpose:
- Customer Service: Streamline the process of logging and managing customer service requests.
- Automation: Automatically create cases in Salesforce without manual intervention.
- Efficiency: Improve the efficiency and responsiveness of customer support teams.
Benefits:
- Immediate Case Creation: Cases are created instantly when customers submit the form, ensuring timely response.
- Improved Organization: Organize and track customer issues within Salesforce for better case management.
- Reduced Manual Work: Automate the case creation process, reducing the need for manual data entry.
- Customizable Forms: Customize the web form to capture the specific information needed to resolve issues effectively.
How Web-to-Case Works:-
The Process:-
- Website Form: A support form is embedded on your website to collect customer issue details, such as name, email, problem description, and priority.
- Form Submission: When a customer submits the form, the data is sent directly to Salesforce.
- Case Creation: Salesforce receives the data and automatically creates a new case record in the system.
- Case Management: The case can then be assigned to support agents, prioritized, and tracked through to resolution.
Technical Aspects:-
HTML Form:
- The form on your website is created using HTML and includes fields to capture necessary customer information.
Salesforce Web-to-Case Endpoint:
- Salesforce provides a unique endpoint URL to which the form data is sent. This URL processes the form submission and creates the case in Salesforce.
Field Mapping:
- Each form field is mapped to corresponding case fields in Salesforce to ensure data is captured accurately.
Setting Up Web-to-Case in Salesforce:-
Step-by-Step Guide
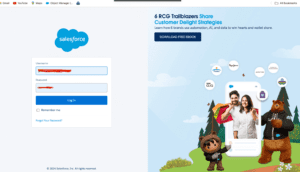
- Log in to Salesforce:
- Access your Salesforce account with appropriate administrative privileges.
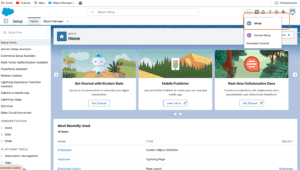
Go to Setup
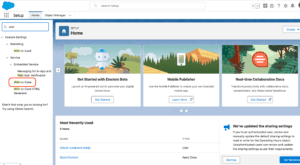
Search Web- to- Case in Quick find
Enable Web-to-Case
If not already enabled, click on “Edit” and check the “Enable
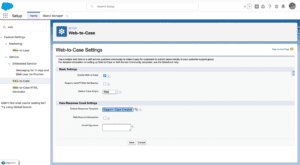
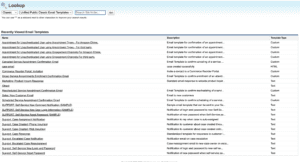
Click on “Create Web-to-Case Form”. Select the fields you want to include in the form.
Customizing the Form:-
Adding Custom Fields:
- Customize the form by adding or removing fields to capture specific information relevant to your business.
Styling the Form:
- Use CSS to style the form to match your website’s branding and design.
Validation Rules:
- Implement validation rules to ensure that the data entered by users is accurate and complete.
Managing Cases Captured from Web-to-Case:-
Case Assignment Rules:-
Automatic Assignment:
- Set up case assignment rules to automatically assign cases to specific support agents based on criteria such as issue type, priority, or customer location.
Case Follow-Up:-
Automated Responses:
- Create auto-response rules to send a confirmation email to customers as soon as they submit the form. This helps acknowledge their issue and provides further information.
Case Escalation:
- Configure escalation rules to ensure high-priority cases are addressed promptly and do not go unresolved.
Monitoring and Reporting:-
Track Case Sources:
- Use Salesforce reports and dashboards to track the effectiveness of different case sources and optimize your support strategies.
Analyze Case Trends:
- Analyze case trends to identify common issues and improve your products or services based on customer feedback.
Best Practices for Using Web-to-Case:-
Optimize Form Placement:-
- Place the support form prominently on your website, such as on the contact page or help center, to maximize visibility and case capture.
Keep Forms Simple:-
- Keep the form short and simple to encourage more submissions. Only ask for essential information initially and gather additional details during the resolution process.
Ensure Mobile Compatibility:-
- Make sure the form is mobile-friendly, as many customers will access your website from their mobile devices.
Maintain Data Privacy:-
- Ensure that your form complies with data privacy regulations, such as GDPR. Clearly inform users about how their data will be used and obtain their consent.
Regularly Review and Update:-
- Regularly review the form and update it as needed to capture relevant information and improve user experience.
Conclusion:-
Web-to-Case is a powerful feature in Salesforce that streamlines the process of capturing and managing customer service requests from your website. By automating case creation and leveraging Salesforce’s robust case management capabilities, businesses can improve efficiency, enhance customer support, and ultimately drive better customer satisfaction. Implementing Web-to-Case involves setting up the form, embedding it on your website, and configuring case management processes to ensure seamless operation.
FAQs
What is Web-to-Case in Salesforce?
Web-to-Case is a Salesforce feature that allows businesses to capture customer service requests from their website and automatically create cases in Salesforce.
How do I set up Web-to-Case in Salesforce?
To set up Web-to-Case, enable the feature in Salesforce, create a web-to-case form, generate the HTML code, and embed the form on your website. Test the form to ensure it is working correctly.
Can I customize the Web-to-Case form?
Yes, you can customize the form by adding or removing fields, styling it with CSS, and implementing validation rules to ensure accurate data capture.
How are cases managed after being captured through Web-to-Case?
Cases can be automatically assigned to support agents, prioritized, and tracked using Salesforce’s case management tools. Automated responses and escalation rules can also be set up to enhance follow-up.
What are the best practices for using Web-to-Case?
Best practices include optimizing form placement, keeping forms simple, ensuring mobile compatibility, maintaining data privacy, and regularly reviewing and updating the form.
You want to know more about this topic is What is Web-to-Case in Salesforce click here
In our next blog post we will discuss about What is Email-to-Case in Salesforce

2 thoughts on “What is Web-to-Case in Salesforce”